Have you ever settled in for a movie night, only to find yourself constantly adjusting the volume because the dialogue is muddy or the bass is overwhelming? If this sounds familiar, you’re not alone. Many home theater enthusiasts face these common acoustic challenges, but the good news is that they’re fixable.
In this guide, you’ll learn everything you need to know about transforming your home theater’s sound from problematic to perfect.
Understanding Your Room’s Acoustic Challenges
Before learning solutions, it’s important to understand that the acoustic design of your home theater deserves the same expertise that goes into creating the films you enjoy. However, it’s inevitable that there could be something wrong with your home theater’s sound.
Think of sound waves like ripples in a pond; they bounce off surfaces and can either work together harmoniously or clash into chaos. In most home theaters, several common issues tend to pop up:
Echo and Reverberation
This is especially common in rooms with lots of hard, flat surfaces like bare walls and hardwood floors. Imagine throwing a ball in an empty room. It would bounce around quite a bit before settling. Sound waves behave similarly.
The Bass Problem
Ever notice how some bass notes sound overpowering while others seem to disappear? This usually happens because of something called “standing waves,” which occur when bass frequencies get trapped in corners or between parallel walls. It’s like having too much of a good thing in some spots and not enough in others.
Unclear Dialogue
If you’re constantly reaching for the remote to turn up the volume during conversations but then scrambling to turn it down during action scenes, you’re dealing with a common acoustic problem. This often happens when room reflections mask or muddy the critical midrange frequencies where human voices live.
Essential Solutions
Now that we understand the problems let’s explore how to fix them. Don’t worry – you don’t need to be an acoustic engineer to make significant improvements. All you need is a good ear, creativity, and a few upgrades. Let’s break down the solutions into manageable steps.
Taming Those Reflective Surfaces
The first step in improving your room’s acoustics is dealing with reflective surfaces. Think of your room like a tennis court – the more hard, flat surfaces you have, the more the sound will bounce around. Here’s how to address this:
Adding Acoustic Treatments
Start by adding acoustic panels for walls. These don’t have to be expensive. While professional panels work great, you can also use thick curtains or even DIY solutions. Place these treatments at the main reflection points. Typically, the side walls and the wall behind your seating. A good rule of thumb is to cover about 15-20% of your wall surface area with acoustic treatments.
When choosing acoustic panels, consider their absorption coefficients at different frequencies. A good acoustic panel should be at least 2 inches thick to effectively absorb mid and high frequencies. For even better performance, 4-inch thick panels provide more absorption at lower frequencies. If you’re going the DIY route, mineral wool (Rockwool) or fiberglass insulation wrapped in breathable fabric can be very effective.
Bass Traps for Better Low-End
Bass frequencies are particularly troublesome because they tend to build up in corners. Installing bass traps in room corners can help control these low frequencies. Bass traps are typically thicker than regular acoustic panels because low frequencies have longer wavelengths and need more material to be absorbed effectively.
For maximum effectiveness, consider floor-to-ceiling bass traps in all corners. If that’s not practical, focus on the front corners first, then add traps to the rear corners if needed. “Superchunk” style bass traps, which fill the entire corner with triangular absorption material, are particularly effective but require more space and materials.
Floor Treatments
If you have hardwood or tile floors, a thick area rug can make a world of difference. The rug helps absorb sound reflections between the floor and ceiling, which can significantly improve overall sound clarity. Consider placing a rug that covers at least the area between your speakers and listening position.
When selecting a rug, opt for one with a higher pile height and denser construction. Adding a thick rug pad underneath can further improve sound absorption. If possible, extend the rug beyond your seating area to catch more reflections.

Optimizing Speaker Placement
Getting your speakers in the right spots is crucial for good sound, and best of all, it’s free! Let’s look at how to position each speaker for optimal performance:
Center Channel Placement
Your center channel is crucial for dialogue clarity. Place it at ear level when seated, and make sure it’s not blocked by any furniture. If you can’t place it at ear level, angle it slightly up or down toward your listening position.
Many people place their center channel inside an entertainment center or behind an acoustically transparent screen. If you must place it in a cabinet, ensure there’s enough space around the speaker to prevent unwanted resonances. At least 3 inches of clearance on all sides is recommended.
Main Left and Right Speakers
Position these speakers so they form an equilateral triangle with your main listening position. This means the distance between the speakers should be the same as the distance from each speaker to your ears. Angle them slightly inward toward your listening position for better sound focus.
For most rooms, starting with a 30-degree angle from the listening position works well. You can fine-tune this angle by playing music with a strong center image and adjusting until the soundstage feels natural and well-defined.
Subwoofer Positioning
Despite what many people think, corners aren’t always the best place for subwoofers. Try the “subwoofer crawl” technique: place your subwoofer in your listening position, then crawl around the room, listening for where the bass sounds best. That’s where your subwoofer should go.
For an even better bass response, consider using multiple subwoofers. Two subwoofers can help smooth out room modes and provide a more even bass response across multiple seating positions.
Surround Speakers
Position surround speakers slightly above ear level and slightly behind your listening position. If you have a 7.1 system, place the side surrounds directly to the sides of your listening position and the rear surrounds behind you.
For optimal surround performance, aim the speakers slightly downward toward the listening area. This helps create a more immersive sound field while reducing unwanted ceiling reflections. If you’re using dipole surrounds, follow the manufacturer’s recommendations for orientation.
Seating Considerations
Where you sit matters just as much as where you place your speakers. Here’s how to optimize your seating arrangement:
Distance from Walls
Avoid placing seats directly against walls. This position often results in boomy bass and unclear sound. Try to keep at least 2-3 feet between your seating and any walls.
The optimal distance from the front wall (the wall with your screen) depends on your room size and screen size. A good starting point is to sit 1.5 to 2 times the screen width away from the screen. This provides good image quality while maintaining a proper sound perspective.
The Sweet Spot
The main listening position should be centered between your left and right speakers. For most rooms, this means sitting about 38% of the way from the back wall. This position typically offers the most balanced frequency response.
This 38% position isn’t arbitrary. It’s based on room acoustics principles that help minimize the impact of standing waves. However, don’t feel bound by this exact measurement; use it as a starting point and adjust based on what sounds best in your room.
Multiple Rows
If you have multiple rows of seating, consider raising the back rows on a platform. This ensures everyone has a clear line of sight to the speakers and helps create more consistent sound throughout the room.
When building risers, make sure they’re solid and well-braced to prevent resonances. Consider adding absorption material inside the riser cavity to prevent it from acting like a drum. Each row should be elevated about 12 inches above the row in front for proper sight lines.
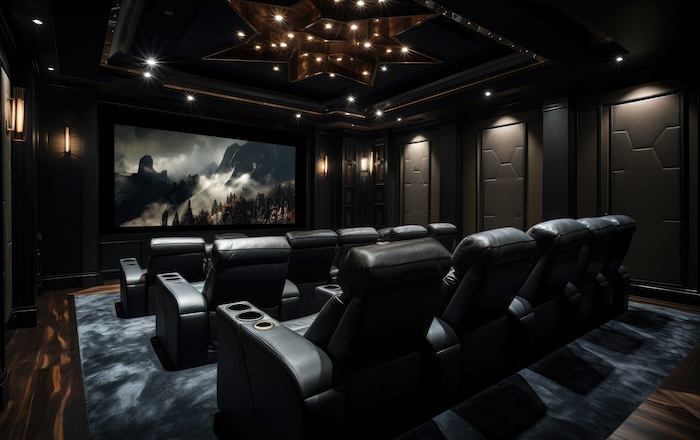
A luxurious black home theater
Fine-Tuning Your System
Once you’ve addressed the major acoustic issues, it’s time for some fine-tuning:
Room Calibration
Most modern AV receivers include room calibration systems. Use these tools as they can help compensate for room acoustics and speaker placement limitations. While they’re not magic bullets, they can definitely help optimize your system’s performance.
EQ Adjustments
Don’t be afraid to adjust your system’s equalizer settings. Start with the room calibration results, then make small adjustments based on what you hear. Pay particular attention to the bass frequencies and dialogue clarity.
Volume Leveling
Many receivers offer dynamic range compression or volume leveling features. These can be particularly helpful for nighttime viewing when you don’t want to wake the neighbors during explosive action scenes.
Advanced Tips for Enthusiasts
For those looking to take their home theater acoustics to the next level, consider these advanced techniques:
Diffusion
Adding diffusion panels can help scatter sound reflections, creating a more natural-sounding space. These can be particularly effective on the back wall of your theater.
Multiple Subwoofers
Using two or more subwoofers can help create a more even bass response throughout the room. This approach can be particularly effective in larger spaces or rooms with challenging acoustics.
Room Modes
Understanding and addressing room modes (the natural resonant frequencies of your room) can help achieve a more balanced bass response. Professional measurement tools can help identify these modes.
Maintaining Your Acoustic Environment
Once you’ve optimized your room’s acoustics, maintain them by:
- Regularly checking speaker positions and adjusting if needed
- Keeping acoustic panels and treatments clean and in good condition
- Periodically re-running room calibration, especially after making any changes to your setup
- Listening for any new acoustic problems that might develop over time
- Documenting your setup and measurements for future reference
Remember that acoustic treatments can collect dust over time, potentially affecting their performance. Regular cleaning with a vacuum or compressed air can help maintain their effectiveness.
Takeaway
Every room is different, so don’t be afraid to experiment with these solutions until you find what works best in your space. The effort you put into improving your home theater’s acoustics will be rewarded with clearer dialogue, more impactful bass, and a more engaging overall listening experience.
With patience and attention to detail, you can transform your home theater from an echo chamber into an acoustic masterpiece.